MiniMap


Additional Information
Construct 2
Construct 3
WHAT IS THE MINIMAP PLUGIN?
As the name suggests – the plugin allows for quick and easy implementation of an in-game map that shows the actual position of objects in the area (layout). This can be a mini-map, typical for strategy games, as well as a “full sized” map like in RPGs (world map).
WHY SHOULD I USE IT?
There are two major reasons:
- It is really easy to use and will save you tons of time.
- It’s greatly optimized.
If you plan to feature a real-time map in your game, then you need to be prepared for lots of work to be done in case you want to code it on your own. The MiniMap plugin by the ForConstruct.com team is nearly a “ready to go” solution. The implementation takes just a few minutes (time for preparing assets you want to use is not included 😉 ).
Regarding optimization, there are two solutions designed strictly for it.
First one is dedicated for immobile objects like constructions, pickable items or markers. For these objects you can set the sprites appearing on the map (icons) as Static. This way the processor will not spend resources on testing the position of the related object, unless you force it with dedicated actions.
Second – the mini-map elements can be pasted to the background image. Pasted objects are immediately destroyed, their sprites are merged with the background sprite and become one image. This way you can have procedurally generated maps where all the elements (like different types of terrain) are reflected with literally no impact on CPU.
Assuming you work on a strategy game with large amounts of roaming units or your project features procedurally generated levels with lots of environmental elements that you want to be reflected on the minimap, these features will surely come handy to you.
HOW DO YOU USE IT?
- Add the MiniMap to your project same as other plugins.
- Place it wherever you desire (a dedicated 0-percentage parallax layer is the most suitable)
- Set the size of MiniMap to have the same aspect ratio as your layout
- In the Event Sheet, use a dedicated action to set the MiniMap’s background image by choosing a desired sprite. This can be a solid colour as well as a premade screenshot of the layout or some fancy hand-drawn map. Just remember that the sprite should have the same size as the MiniMap object and the Origin Point should match MiniMap’s hotspot.
- Set which objects and how are to be represented on the MiniMap. E.g. at the start of layout, use an action to add an object to the minimap, where you indicate:
- which object is to be included,
- set it’s icon (a sprite that represents the object on the map),
- set if the icon is Active or Static
- set if the icon’s angle mimics angle of the represented object.
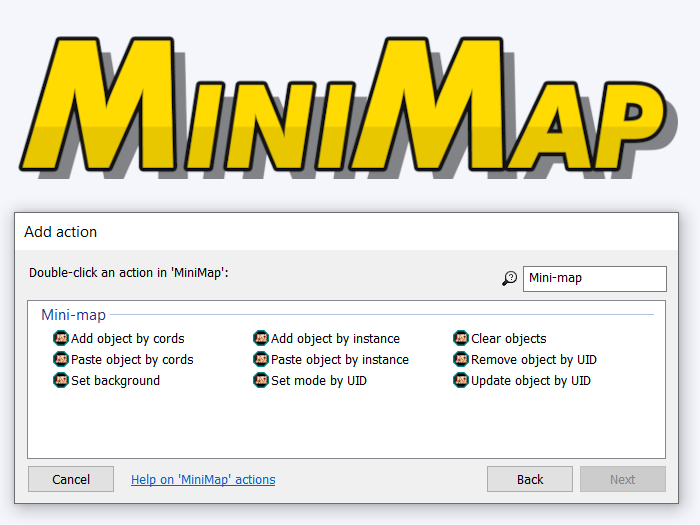
MINIMAP ACTIONS